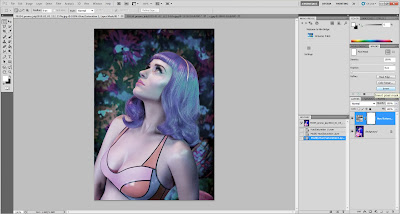
Today, I learnt about Gamut Warning in Computer Graphic Tutorial Class,which can help me to solve printing problem and improve the quality of my printed work. Before this I don't understand what the gamut warning feature is supposed to be telling me, but after the tutorial class, I think I get it now. = ]
Printing Gamut Concerns
As we know when printing, a whole new concern becomes apparent. In case you have not noticed yet, things do not always appear the same on your monitor as they do when they come from your printer.Though some of this may be due to calibration problems, it is likely that this is because you are trying to print colors that are "out-of-gamut."
Our monitor creates colors by mixing red, green, and blue light (RGB), on the other hand our printer creates color by using light-absorbing inks of cyan, magenta, yellow, and black (CMYK). These pigments are much more limited in their ability to display color than your monitor. Therefore, what you see on your monitor is often NOT what you get in print.
Gamut Warning View.
If you want to see which particular colors are out-of-gamut, you can do this using Shift-Ctrl-Y or View > Gamut Warning. This grayed out view (see right) is not what will show when you print, but this shows you which of your colors will be muted for printing.
Digression: In this view, you can do a color correction, if you want, and this will bring these colors back into view. Once they are visible, they will be printable as you see them!
_________________________________________________________________
This is what I did after that class.
Step 1, Open a chosen picture or photograph.

Step 2, View the Gamut Warning using Shift-Ctrl-Y or View > Gamut Warning. Then we will noticed the grayed out view, that is not what will show when you print, but this shows you which of your colors will be muted for printing.
Step 3, Then we can adjust the Hue and Saturation in the right hand side tool box to solve the Gamut Warning.

Step 4, This setting will effect the entire image included the places that didn't fall out side the gamut , in order to avoid this, I will only desaturated the places that out of gamut. To do this, we can utilize the hue and saturation in the layer Mask.
Click> hue and saturation layer> Mask> Invert

Step 5, After we inverted the Mask, those Grayed spot will appeared again.

Step 6, Then use the Brush Tool (B) to remove ONLY those greyed spot.

Step 7, Slowly remove the Greyed spot by zooming in.

This is what it becomes after done with the brush tool touch up.

100% DONE !


nice job man, thanks :)
ReplyDelete